
If you recently set up Cloudflare CDN for your website and noticed that your email stopped working, you’re not alone. This is a common issue that many users face due to DNS misconfigurations. In this blog post, we will guide you through the process of troubleshooting and fixing email delivery problems caused by Cloudflare CDN. By the end of this guide, your email should be functioning correctly again.
Common Symptoms
- Emails are not being delivered.
- You receive a “No Such User Here” error message.
- Emails are being bounced back.
Root Cause
When you set up Cloudflare CDN, it changes your DNS settings to route traffic through its network. This can sometimes lead to misconfigured DNS records, especially for email services. The key to solving this problem is to ensure that your DNS records, particularly the MX records, are correctly set up for your email provider.
Step-by-Step Solution
1. Verify Your MX Records
The first step is to verify that your MX records are correctly configured for your email service provider. For Google Workspace, the correct MX records are:
ASPMX.L.GOOGLE.COM(priority 1)ALT1.ASPMX.L.GOOGLE.COM(priority 5)ALT2.ASPMX.L.GOOGLE.COM(priority 5)ALT3.ASPMX.L.GOOGLE.COM(priority 10)ALT4.ASPMX.L.GOOGLE.COM(priority 10)
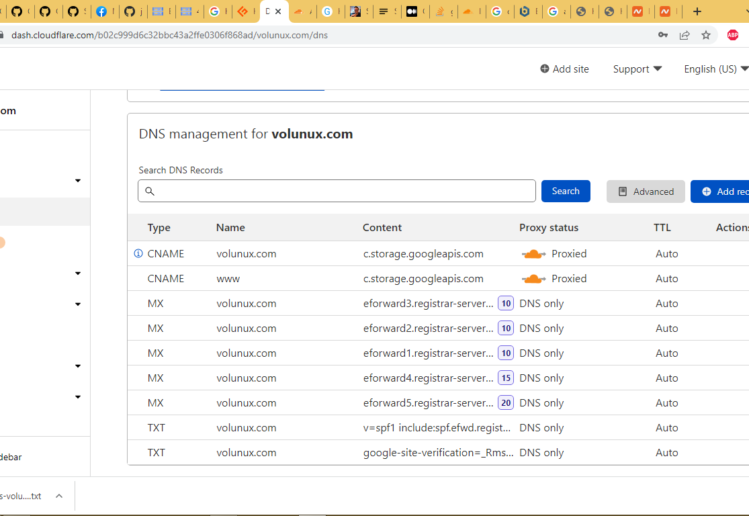
2. Update MX Records in Cloudflare
- Log in to Cloudflare: Log in to your Cloudflare account and select the domain you’re having issues with.
- Go to the DNS Section: Navigate to the DNS settings for your domain.
- Delete Existing MX Records: Delete any existing MX records that do not match the ones required by your email service provider. In our example, we need to remove the following records:
mx10.antispam.mailspamprotection.commx20.antispam.mailspamprotection.commx30.antispam.mailspamprotection.com
- Add New MX Records: Add the new MX records provided by your email service provider. Here are the steps to add Google Workspace MX records:
- Click on “Add record”.
- Select “MX” from the drop-down menu.
- Enter the following values:
Name Mail Server Priority @ ASPMX.L.GOOGLE.COM 1 @ ALT1.ASPMX.L.GOOGLE.COM 5 @ ALT2.ASPMX.L.GOOGLE.COM 5 @ ALT3.ASPMX.L.GOOGLE.COM 10 @ ALT4.ASPMX.L.GOOGLE.COM 10 - Set the TTL (Time to Live) to Auto.
- Click “Save” after adding each record.
3. Check the A Record for ‘mail’
Ensure that the A record for mail is set to “DNS only” (gray cloud icon) instead of “Proxied” (orange cloud icon). This is crucial because Cloudflare does not proxy email traffic.
- Find the
mailA record in your Cloudflare DNS settings. - Click on “Edit” next to this record.
- Click on the orange cloud icon under “Proxy status” to change it to a gray cloud (DNS only).
- Save the changes.
4. Allow DNS Propagation
DNS changes can take some time to propagate. Wait for a few hours and then test your email functionality.
Conclusion
By following these steps, you should be able to resolve email delivery issues caused by Cloudflare CDN. Ensuring that your MX records and other DNS settings are correctly configured is key to maintaining seamless email communication. If you continue to experience issues, consider reaching out to your email service provider for further assistance.